Saturday, October 31, 2009

Halloween Page Titles

Happy Halloween Everyone!

Enjoy these Halloween Page Title Ideas:

  • Mummies, Ghosts and Goblins...Oh My!
  • Witch way did they go?
  • Trick or Treat
  • I want CANDY
  • Boo
  • Monster Mash
  • A Ghoulish Eve
  • Howling Good Time
  • The Witch's Brew
  • Eye of Newt


Friday, October 23, 2009

Still time to get your FREE Photo Book

Ever want to try Digital Scrapbooking? Now is the best time...you can get a FREE 20-page 7.5" x 5.5" Soft Cover Photo Book and all you pay is $5 for shipping. There are only about 10 codes left and they don't expire until December 31, 2009. Plenty of time to make some awesome holiday gifts.

Visit Celestial Scrapbooks to find out more!

Sunday, October 18, 2009

Page Kit SALE!

ALL PAGE KITS ON SALE - 50% off through Halloween!

Each kit typically has 2 -3 sheets of coordinating patterned paper, 3 - 5 sheet of coordinating cardstock and matching embellishments. Plus, each kit is designed around a different scrapbooking technique. You can easily make a 2-page layout and then some with each kit. Some of the techniques available:
  • Felt
  • Grungeboard
  • Glimmer Mist
  • Templates
  • Dry Embossing
  • Flocking
  • Lace Paper
  • Vinyl Letters
  • and MORE!

Tuesday, October 13, 2009

Turkey Trot Crop - Nov 21


Turkey Trot Crop

Get your scrappin' done before the Holiday Madness Starts!
This is a Charity Crop that will benefit the Make-A-Wish Foundation!


Date: Saturday, November 21, 2009
Time: 9 AM - 9 PM
Place: St. Paul's United Methodist Church
1314 Foulk Rd., Wilmington, DE (next to Brandywine HS)
Cost: $45 unless you register EARLY!

Register & Pay by Halloween - Crop costs $40 & you get a $10 Gift Certificate to shop Celestial Creations & Scrapbook Supplies!

Register & Pay by November 7th - Crop costs $40

What you get:
  • Food (Breakfast, Lunch, Dinner, Snacks, Chocolate & Beverages)
  • Door Prizes
  • Vendors
  • Classes
  • Raffles
  • Massage Therapists (based on interest...if you are interested...let me know!)
  • Time & Space to Scrap the day away!
E-mail celestial.creations@verizon.net for a registration form!

Monday, September 21, 2009

Scrapbook Yard Sale - 9/26/09

Don't forget that the infamous Scrapbook Yard Sale is this SATURDAY!!

Date: Saturday, September 26, 2009

Time: 9AM to 1PM

Location: St. Paul's United Methodist Church, 1314 Foulk Rd., Wilmington, DE
Right next to Brandywine High School

Custom Checkbook Covers

Finally back in stock - customizable checkbook covers! These Bare Elements Clear Checkbook Covers by Creative Imaginations let you create your own personalized checkbook cover for yourself or for someone special. Each package contains one checkbook cover with a monthly calendar. The calendar is perfect for any year because you add the daily numbers for each month.

See the examples below:


Sunday, September 13, 2009

How to Make a Christmas Countdown Cookie Sheet Advent Calendar


Supplies You Need:
Cookie Sheet
Crop-A-Dile
Patterned Paper
Embellishments
Ribbon
Strong Adhesive (Mono Aqua & Glue Dots) & Terrifically Tacky Tape
Self-Adhesive Magnet roll (1/4" wide)
1.5" Circle Cutter
Sticker Numbers or Stamps
Ink Pads
Day Marker

Cookie Sheet:
Select or purchase the cookie sheet that you would like to use. I found the cheapest cookie sheets at Christmas Tree Shops; however, it may vary according to where you live. You may find some at dollar-type stores; however, in this area I did not find any. I used the back-side of the cookie sheet to do the project and left the sheet un-altered. I have seen some cookie sheet calendars where they spray painted the cookie sheet.
NOTE: If you buy a cookie sheet that has a non-stick coating, you need to scratch that off in order for the adhesive (or spray paint) to stick. If you have a handy-man that has cool tools he can sand it off in a matter of minutes in the garage. If not, good old-fashioned sandpaper and some muscle should do the trick.

Crop-A-Dile & Hanging Ribbon:
Use the Crop-A-Dile to punch two holes for the ribbon to hang the cookie sheet from. I threaded the ribbon from the front of the project to the back through one of the holes and tied a couple knots on the backside that were large enough for the ribbon not to pull through; however, you could also tie a bow.


Patterned Paper & Embellishments:
For this project I used Bo Bunny 'Tis the Season Collection (Carol, Deck the Halls, & Fa La La Paper and the Flowers & Buttons & Bling embellishments). I also found some ribbon that coordinated with the paper.

Obviously, the layout is going to depend on the size and orientation of the cookie sheet. The cookie sheet I used had a usable space that was about 9.75" x 15" so going across . I did some math and some dry-runs to see what would work and found that I had plenty of space to use a 1.5" circle punch for the numbers.

Since the cookie sheet I was using was larger than the cardstock I used two different types of cardstock for the base and covered the edges where they met with ribbon (tucking the ribbon under the paper PRIOR to gluing!). Essentially, I cut the sheet of cardstock to fit the width and length of the cookie sheet then trimmed the corners to match the roundness of the pan. I would recommend Mono Aqua coupled with a few glue dots for the corners and middle for adhering the cardstock to the cookie sheet. Don't forget the adhesive won't stick if you don't scratch off the non-stick coating first.

The numbers were created by cutting patterned paper with a 1.5" circle punch, stamping with the appropriate numbers then inking the edges. I used Mono Aqua to glue them to the paper.

Day Marker:
I used a Technique Tuesday Chipboard shape; however, you could also use Grungeboard or other chipboard shapes or even a slide mount for the day marker. Since I was using chipboard, I sprayed the chipboard square with Green Meadow Glimmer Mist and used a flower and jewel to accent the corner. This is where the magnets come in! Once the chipboard is dry, cut four small pieces of magnet tape to fit on the backside of the day marker. I used a self-adhesive roll of magnet tape about 1/4 inch thick that you can get at Lowes (it was near the picture hanging stuff).


At the very bottom of the page, I cut out the trees from the Bo Bunny Tis the Season Deck the Halls paper and used that as an accent for the bottom of the cookie sheet. I glued that down with Mono Aqua.

I would estimate that the project took 2 - 3 hours to create. It may take longer or shorter depending on how fast you work. They are really cute and there are many possible design scenarios. Titles could be December, Days till Christmas or Christmas Countdown. You could also do the project landscape style instead of portrait style. It is a fun project, so give it a try - just make sure you finish it prior to Christmas!

Tuesday, September 8, 2009

Back to School Page Titles

It is that time of the year again, summer as we know it is over and it's time for the kids to go Back to School. There are always mixed emotions when it's time to go back to school - excitement, fear, loneliness and joy. Whatever your emotions are about school it is also a great opportunity to take some photos and scrapbook the memories. I have compiled some Page Titles and Ideas for Back to School Themed layouts below.

Some Back to School Title Ideas:
  • School Days
  • The Wheels on the Bus (option to continue with - go 'round and 'round)
  • Teacher's Pet
  • School Daze
  • ABC - Easy as 1, 2, 3
Scrapbook Layout Ideas:

MOSD Intracacies - School - I always thought it would be a cool idea to use this intracacy and cut out small photos of the kids faces and place them in the bus windows. Need more ideas on how to use Intracacies - check out this former blog post on How to use lace cardstock & intracacies.


Saturday, September 5, 2009

Bo Bunny Tis the Season Collection - Coming Soon

Bo Bunny 'Tis the Season Collection:

Double-sided Patterned Paper - Tis the Season, Deck the Halls, Carol, Fa La La

Embellishments - Stickers, Rub-ons, Jewels, Flowers, Buttons


Should be in mid-September and watch for a post for a Christmas Countdown Calendar!

It's in....check out the Bo Bunny Tis the Season Collection.

Wednesday, September 2, 2009

Cricuit Cartridges....you don't need those anymore!

Are you addicted to your Cricut but hate lugging around all those cartridges?! Cricut is coming out with a new device called the Gypsy that is basically a flash drive that stores your cartridges. Here's the kicker...once you load a cartridge onto the Gypsy the serial number of the Gypsy is "linked" to that Cartridge which means you can't upload it to a different Gypsy. What else does that mean? That means you can't sell that cartridge to anyone who wants to use it on a Gypsy!

So what is a girl (or guy) to do? Check out the Sure Cuts ALot Software. The software allows you to use your Cricut to cut True Type fonts and graphics in .sgv format. You can download thousands of fonts and have them at your fingertips! The software was just updated to version 2.0 in late July and it allows you to "see" where on the mat your item will cut.

If you would like to give it a try click on the logo below:


You can save an extra 10% by using code 1847253 at checkout.
Code expires 09/08/09

Sunday, August 30, 2009

Glimmer Mist Kit & Tips

Tips for Using Glimmer Mist:
  • Prior to using gently shake or swirl to get all the glitter off the bottom
  • Put something underneath the items you are spraying -an old cookie tray works great!
  • Works best on porous items such as paper, chipboard or grungeboard
  • Great for ribbon and paper or fabric flowers
  • Create custom Canvas Wall Hangings
  • If you want to stamp an image with water-based ink - stamp it AFTER you glimmer mist the paper. (Not that I know this from experience...but it will make water-based ink run)
  • Try using the Glimmer Screens to make designs on paper or canvas. They can be used as a positive or negative design. If you want to use the positive then you spray the glimmer mist on the screen and use it as a stamp.
How to Use Glimmer Mist:
If you want a "fine" coating then hold the bottle at least 5 inches away from the object. If you would like a "splotchy" look then keep the bottle close to your object when you spray it. You can also layer the glimmer mist colors to get different affects. The Glimmer Mist will dry fairly quickly on chipboard and paper, but if you need to speed up the process you can use a heat gun to give a little assistance. Once dry the item will have a slight shimmer which just adds a nice little accent to your page.

Glimmer Mist Kit Contents:

My Minds Eye Out & About Single-sided paper - one sheet of each of the following:
  • No. 1 Paisley
  • No. 1 Stripes
  • No. 1 Floral

Core'dinations Cardstock as follows:
  • one sheet pink
  • one sheet red
  • two sheets Avocado

Ribbon
Flowers & Flourishes
Pearlescent Glimmer Mist in mini mister

Wednesday, August 26, 2009

Adhesives, Cardstock, Ink & Chalk SALE

Attention shoppers - for four (4) days you can get 25% off the following categories when you shop Celestial Creations & Scrapbook Supplies online store:

  • All Adhesives - save on EZ Runners, Glue Dots, Terrifically Tacky Tape
  • All Cardstock - save on Bazzill, Basic Grey
  • All Ink & Chalk - save on Ranger & Cats Eye Ink Pads, Alcohol Ink, I'Kandee Chalk
Come STOCK UP on your basic scrapbook supplies and save from Thursday, August 27th through Sunday, August 30th! Shipping is just $5 within the USA and you will get FREE SHIPPING when you spend $50!

Tuesday, August 25, 2009

Ellen Degeneres Wacky Chair Contest

The Boys and Girls Clubs of Delaware are having a contest to see who can make the Wackiest Adirondack chair. Each Boys and Girls Club in the State of Delaware worked with an artist to design their Wacky Chair and the chair with the largest amounts of votes will win. The winning chair, artist, child and family will travel to Los Angeles to be on the Ellen DeGeneres Show.

So, please take a minute to vote - you could even win two tickets to the Ellen DeGeneres Show, airfare and accommodations! The first vote is FREE and each additional vote is $1 - but the more you vote....the more chances you get to win the tickets to the show!

Click here to vote! - I am diggin' the Claymont chair!! Hint, hint...vote for Claymont!

Wednesday, August 19, 2009

Top 5 Digital Scrapbook Topics

  1. Wedding
  2. Travel
  3. Sports Season
  4. Child's First Year
  5. Pets
For a limited time you can try Digital Scrapbooking FREE! Visit Celestial Scrapbooks to get started. You can get a Free 7.5 x 5.5 Soft Cover Photo Book with 20 pages. You just pay shipping and handling (less than $5). You can add more pages for a small fee.


Sunday, August 16, 2009

2-Page Layout Contest Winner


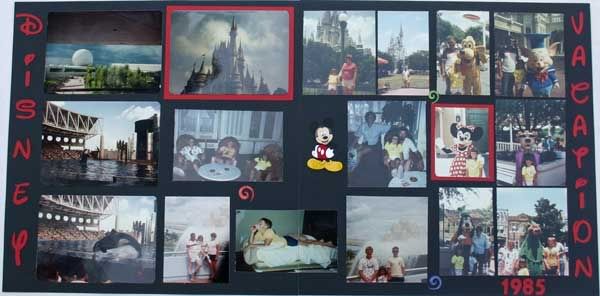
We have a winner! J. Grant submitted the photos above because there were just too many and they were unsure how to fit them all on the page. This layout has 17 photos in it, granted most of them were cropped down to fit, but it shows that you can fit a LOT of photos on one layout!

The trip was so long ago that they didn't want any journaling, but you could always work in some hidden journaling behind one of the photos.

Saturday, August 15, 2009

Basics for the Beginner Scrapbooker

Beginner scrapbookers don't need to feel intimidated by all the products and tools out there. If you are a beginner scrapbooker you can start scrapbooking with some simple tools and supplies.

Adhesive (typically under $7 each):
There are two basic types of adhesive - wet and dry. The dry adhesive is great for adhering photos to cardstock and cardstock to cardstock. My favorite dry adhesive is 3L's EZ Runner Adhesive because it is easy to use, you don't have to worry about refilling and it doesn't get caught up in itself - plus 3L donates money to charities such as Make-A-Wish and Breast Cancer Research. For a little stronger dry adhesive there are Glue Dots that come in a variety of sizes and thicknesses. For wet adhesive, I prefer Mono Aqua. This adhesive is great for when you need to glue items together but need a little "wiggle" room before the glue sets. For example, if you are gluing letters that have a background and you might need to wiggle them into place before the glue sets.

Trimmer and Scissors ($10 - 25 each):
A good pair of scissors and a trimmer are a neccessity. Trimmers come in two basic styles - guillotine and rotary. The guillotine trimmers are ones that have a blade on the handles that chomps down on the paper to cut it and rotary trimmers have the blade tucked away in a cover. Personally, I feel the guillotine trimmers are dangerous because you could chomp your finger off and noboby wants that! So, I would recommend a rotary trimmer such as Tonic's 12" Portable Rotarty Trimmer. It is lightweight, the arm comes out so you can still measure and cut 12 inch pages and it gives a clean cut. For scissors, you need a pair of sharp scissors like EK Success's Color Bee Titanium Craft Scissors. These little guys are sharp - right down to the tip, which helps you get into tight spaces.

Page Kits (typically under $20 each):
I think the hardest part of starting to scrapbook is trying to match up patterned paper, cardstock and embellishments. That is why page kits are great because they typically have patterned paper with matching cardstock and embellishments already together. All you have to do is pick out a kit that you like or that matches your theme or colors of what you are trying to scrap.

Journaling Pens (under $3 each):
Not everyone is a fan of journaling; however, the whole point of scrapbooking is to preserve your memories - journaling definitely helps! I would recommend a journaling pen, such as ZIG's Dual Tip Memory Writer or Tombow's ABT markers.


Album ($12 to $30 each):
Lastly, you need an album to safely store all your beautiful layouts. Albums come in all different sizes, shapes and materials. Please contact me if you are in the market for a scrapbook album. because I have access to thousands of styles and can show you several styles to choose from.

Essentially, for under $100 you can get all the supplies that you need to get you started. If you are new to scrapbooking and have any questions or problems, please feel free to e-mail me at celestial.scrapbooks@verizon.net. I will do my best to answer whatever questions or concerns you might have.

Saturday, August 8, 2009

Vinyl Letters Use 101 - Create a Custom Vanity Plate

It only took me 9 months, but I finally figured out what to put on my front license plate. In Delaware we don't have front State License Plates, but I purchased my car out of state, so it came with a front plate holder. I was going to take it off altogether, but it was attached to the bumper so I would have been left with holes in my front bumper. So, I had this dilemma of what to use as my front plate.

Then it hit me! I can get vinyl letters cut to say whatever I want! I went to Pep Boys, our local automotive store, and purchased a plain black license plate then contacted Midnight Oil Scrapbook Design to have the letters cut.

So simple....why didn't I think of that 9 months ago?!

Need a custom plate?
Shoot me an e-mail at: celestial.creations@verizon.net

Here is a picture of my custom license plate:


Sunday, July 26, 2009

Distress Stickles Scrapbook Page Kit


DISTRESS STICKLES KIT CONTENTS:

1 sheet My Minds Eye Bohemia Bella Sweet Sisters double-sided patterned paper
1 sheet My Minds Eye Bohemia Bella The Little Moments double-sid
ed patterned paper
1 sheet My Minds Eye Bohemia Bella Mother Bird double-sided patterned paper
1 sheet Core'dinations cardstock - Aruba
1 sheet Core'dinations cardstock - Vavavoom
2 sheets Bazzill White
1 length of shear ribbon
Distress Stickles - Antique Linen


NOTE: Distress stickles have a larger opening….therefore it will come out faster than regular stickles!!


Tips and ideas on using Stickles - check out these two previous blog posts:

Even More Cool Ways to Use Stickles

Cool Ways to Use Stickles


Here is an example layout using the kit:


Thursday, July 23, 2009

Scrapbook Yard Sale!

The Scrapbook/Stamping Garage Sale

is finally here!!!

Do you want a table to sell the supplies you no longer use??? Start cleaning out the scrapbook clutter...this is the sale for you!!

When: September 26th

Where: St Paul’s UM Church (next to Brandywine High School)

1314 Foulk Road Wilmington, DE

Time: Set-up begins at 8:30 Sale time: 9:00-1:00

Cost: $25 per table

If you are interested in a table please contact me for more information at justscrapit2@comcast.net or 302-477-0495.

BUT WAIT…that’s not all!! This year we are adding an afternoon/evening crop.

Same day, same place!! Crop will begin at 2:00 and end at 11:00 p.m. Cost: $25. If you do both the garage sale and crop the cost is $40 for the entire event.

ALL PROCEEDS GO DIRECTLY TO OPERATION SMILE

DON’T DELAY….TABLE SPACE IS LIMITED

Pamela Richardson
Independent Consultant
Close To My Heart
Shop any time for current, discontinued, and discounted items at my online store:
www.prichardson.myctmh.com

Thursday, July 9, 2009

Win a 2-Page Scrapbook Layout!

This month, one person will win a 2-page layout design! This contest is open to all scrapbookers that either have a layout they are unhappy with and want redone OR you have photos that for whatever reason...you just can't scrap.

How to enter:
1. Submit
one of the following on or before July 31st via e-mail to celestial.creations@verizon.net:
  • photo of layout you would like redone OR
  • the topic of the photos that you can't scrap and why you can't scrap them.

2. On July 31st the winner will be notified of selection.

3. Completed projects will be posted on this Blog and be presented in the next Newsletter. (Not getting the newsletter? Sign up here!)

Winners agree to have the before and after photos published on my blog and in the next newsletter. The winner will pay to have the layout or photos mailed via Priority Mail to me.

Celestial Creations & Scrapbook Supplies will pay for Return Postage.

Any Questions, please e-mail celestial.creations@verizon.net

Tuesday, July 7, 2009

Christmas in July SALE!

The Entire store is 10% off from July 7th through July 21st. Plus, select Christmas items are 20% off!

Visit Celestial Scrapbook Supplies to shop and save!

Sunday, July 5, 2009

Fear Not the Patterned Paper

Are you afraid of patterned paper? Do you look at it and wonder how the heck you are going to match it up, let alone try to add other patterns to the mix?! Well, fear no more. Below are some tips for using patterned paper.


Tips for Choosing & Coordinating Patterned Papers

  • Select papers from the same range of the Manufacturer (i.e. Basic Grey has Collections where all the papers match)
    • This ensures your papers will match. You may not like some of the combinations together…but they would match!
    • Try to mix it up – don’t put all of one design type together – mix it up by using one, two or three different designs
  • Use your Eyeball
    • Mix and match your patterns to please your eye. Not everyone has the same taste, but you will know what patterns you like together.
  • Color Schemes
    • You can choose patterns that have colors in the same color family OR
    • You can choose patterns that have colors that complement each other (i.e. ones across from each other on the color wheel)
  • Use as embellishments - cut out individual elements of a patterned paper to use on your layout or use Sizzix or Cricut to create your own embellishments
  • Use strips of patterned paper as a background for a photo or create a basket weave pattern
  • Mat your photos on Patterned Paper
  • Patchwork – great use of scraps
  • Use both sides of double-sided paper by creating flowers or folding the paper so you can see both sides.


See the example below, which combines four (4) types of patterned paper from My Mind's Eye Laundry Line Coastal Collection. If you like the My Mind's Eye Laundry Line Coastal Collection, try this Scrapaholix USA Kit which contains six (6) glitterly Coastal Collections sheets, but coordinating cardstock!


Tuesday, June 23, 2009

EZ Runner Adhesive SALE - Buy 3 and Get 1 FREE


Scrapbook Adhesives EZ Runner by 3L is my FAVORITE dry adhesive. Each package has 33 feet of permanent, acid-free and archival safe adhesive. I have never had one get tangled up in itself and they run very smooth. Additionally, for every tape runner purchased, Scrapbook Adhesives donates 4 cents to the Make A Wish Foundation and they are also sponsors for The National Breast Cancer Foundation. Two charities that are close to my heart.

So, now is the time to stock up on adhesive! Buy three (3) EZ Runners and get one FREE! Promotion ends July 7, 2009!

Sunday, June 21, 2009

Personalize your Space with Sick Ons!

Stick On Monograms by Midnight Oil Scrapbook Design (MOSD) are great for personalizing your walls. These are like rub-ons but better because you can alter them to make them match whatever project you are working on. You can use alcohol ink, solvent ink or paint to make them whatever color and design you want. In this example, I created the phrase "Scrap Zone" with the Monograms. I used Eggplant, Lettuce and Butterscotch Alcohol Ink by Tim Holtz. Then I outlined the outer circle with Stickles. In hindsight, I would recommend applying the Stickles after you have adhered your project because it interferred with the transfer sheet. After you are done altering the Stick Ons, let them dry then use the Transfer tape that is on the back of each letter. Essentially, it works like a rub-on....you place the transfer tape over your Stick On, rub it then peel it off with your Stick On attached. Next you place the transfer tape and Stick On onto your project, rub it and peel off the transfer tape - leaving behind the Stick On. Easy!

Before - un-altered Stick On Monogram


After - Altered with Alcohol Ink

The finished project!

Thursday, May 28, 2009

Get a Free 7.5 x 5.5 Soft Cover Photo Book

Have you ever wanted to try digital scrapbooking, but were afraid? Well, now is the time. For a limited time, you can get a FREE* 20 page 7.5 x 5.5 Soft Cover Photo Book. You pay for the shipping and handling (under $5 for economy shipping) and for any extra pages you want to add to the book. The book comes with 20 pages, but you can add pages for 25 cents per page up to a maximum of 100 pages.


Instructions for Getting Your Free Book Code:
Step one - Visit www.photobookoffer.com
Step two - Enter access code: CS0509
Step three - Click the Submit Button
Step four - Visit www.celestialscrapbooks.com and use code at checkout


*Does not include shipping and handling fee of $4.95. Free book includes 20 pages; additional pages available at extra cost.


The program is simple to use, fast and fun. You don't have to upload your photos because you use them right off of your computer. All you need is Internet access with Internet Explorer and you can start creating photobooks, calendars, mugs, shirts, luggage tags and much more! If you would like more information visit Celestial Scrapbooks - there are tutorial videos and you can compare our products to our major competitors.

Friday, May 22, 2009

Heidi Swapp Invisibles


Heidi Swapp Invisibles allow you to make a truly unique page! Each sheet of cardstock has a pattern on it with a resist material that allows you to use ink, chalk or glimmer mist to create your own special pattern. The areas without the resist material accept the color, but the resist areas do not accept the color and the pattern comes through.

Tips for Using the Mask

  • De-stick it a little by dabbing on your clothes to remove some of the sticky.
  • Layer with the positive and negative shapes
  • Lay the mask sheet face down on the work surface then lay the Invisible face down on top of it – it is much easier to get the shapes straight if you do it this way rather than juggling with a floppy, sticky piece of plastic! Turn over and smooth the mask in place.
  • Use a blending pad to apply ink or chalk
  • Clean the mask after use so the next time you use it the previous color doesn’t come off onto your new project.
  • Use scrap paper if you are near the edge of the page – that way you can keep on inking without worrying about getting it on the table.

What can you use?

  • Acrylic paints (go easy so the paper doesn’t get too wet!)
  • Chalks
  • Glimmer mists
  • Inks

Care of the Mask

Always store the mask on its backing sheet when not in use, and take care to clean off any ink after use. If it loses its “stick” after a few uses, wash it gently in warm soapy water and allow it to air dry and it will be as good as new again, a spray removable adhesive could also be used.


Create your own masks!

You can create your own masks with almost anything - die cuts or chipboard comes to mind. They are a great way to make your own masks without spending a lot of money. Just remember to use repositionable tape!!