Showing posts with label Midnight Oil Scrapbook Design. Show all posts

Saturday, August 8, 2009

Vinyl Letters Use 101 - Create a Custom Vanity Plate

It only took me 9 months, but I finally figured out what to put on my front license plate. In Delaware we don't have front State License Plates, but I purchased my car out of state, so it came with a front plate holder. I was going to take it off altogether, but it was attached to the bumper so I would have been left with holes in my front bumper. So, I had this dilemma of what to use as my front plate.

Then it hit me! I can get vinyl letters cut to say whatever I want! I went to Pep Boys, our local automotive store, and purchased a plain black license plate then contacted Midnight Oil Scrapbook Design to have the letters cut.

So simple....why didn't I think of that 9 months ago?!

Need a custom plate?
Shoot me an e-mail at: celestial.creations@verizon.net

Here is a picture of my custom license plate:


Saturday, May 9, 2009

Acrylic Dogbone Album


Acrylic albums are clearly a lot of fun! The clear pages give you lots of options because you can completely cover them with paper or you can use them clear so that you can see-thru to the next page. In this album, I did a little of both! I'll walk you through the steps I took to create this acrylic dogbone album.

First up...ink the edges. Alcohol ink works great on acrylic and you can mix the colors to get just the right effect. I inked the edges of all five pages of the album even though I was covering some of the pages with cardstock. You can use the inked edges to "hide" gluedots and when the paper doesn't line up perfectly....not that that ever happens to me! ;).

Here is a close-up of the inked edge:


Now, there is a little planning involved in what you want to do next - all covered, all clear or mix-n-match. I decided to do every other page covered, so the cover, 3rd and last pages were covered with cardstock. Double-sided cardstock works great on this type of project because you can see both sides. Lay the shaped album on the cardstock and trace around it, then use scissors to cut a little to the inside of the line. Once you have the first cut, line up the cardstock with the album page and make some adjustment cuts as needed! Believe me you never get it right the first time and there are always some minor cuts that need to be done. Next, adhere the cardstock with small glue dots along the edge of the shape, which will be hidden by the inked edge.

When you do clear pages you need to plan ahead a little because you can see through to the pages behind them. For one of the pages that I left clear, I cut out two photo mats the same size and glued them on back to back. Then on the page behind the clear page I used the same size photo mat so when the clear page is on top, you can't see the photomat of the page behind it. Clear as mud right?! Hopefully this example below will make it a little clearer.


The other option for clear pages are to have something from the page behind "peek" out when the clear page is on top. See the example below where I used a rectangle sized photomat on the clear page and three square photomats on the cardstock page so two parts of the squares show through.


The last step is to add some embellishments and use various ribbons and fibers to help hide the metal ring that keeps the book together. Tada....You're done!

Also check out the Top 10 Ways to Alter Acrylic.


This book is dedicated to our good friend Neo the German Shepherd - you will be missed.

Tuesday, April 14, 2009

How to use Lace Cardstock & Intracacies

Lace Cardstock or Intracacies are essentially a sheet of cardstock that has been cut out to leave behind an intracate, interlocking design. There are so many possibilities for designs that it is almost endless. Midnight Oil Scrapbook Design has designs like dog paws, princess crowns, school bus, baseball, football, pirates, butterflies, Mickey Mouse heads, and so much more!

Here are some examples of ways you can use lace cardstock or Intracacies on a layout:
  • Background - You can use the Intracacies as a background by gluing it to a sheet of cardstock and creating your layout on top of the design.
  • Cut it Apart - Cut out sections of the design to use on your pages. Depending on the design, this might take a little skill making it look even.
  • Make it a Mask - You can place the cutout design on a sheet of cardstock and ink, chalk, or glimmer mist over it. Carefully, lift off the Intracacies and the design will be left behind on your cardstock.
  • Alter it - You can also use ink, chalk or glimmer mist to change the color of the Intracacies so that it matches your layout. Depending on the design, you may be able to accent a part of the Intracacies by backing a section of it with cardstock. In one of the layouts below, I used some pink cardstock behind one of the white flower Lace Paper to highlight that flower. On MOSD's School Theme Intracacies I think it would be neat to cut out little pictures of the kids and put them in the windows of the school bus.
  • Make it a Frame - Use the Intracacies to "frame" your photo. Cut out a portion of the Intracacy so your photo can show through it.
Some Examples:


Birthday cards - I colored the white Flower Lace Cardstock with Glimmer Mist - Pink Ink and cut out the design.


Scrapaholix Page Kit - Same white Flower Lace Cardstock as above, but I didn't color it. I cut out sections and in the top left corner, I accented one flower with pink cardstock. Some of the flowers were placed ontop of the photos...for a change of pace!


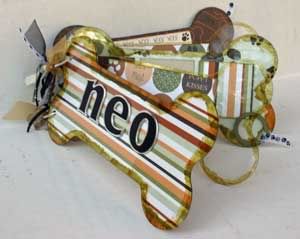
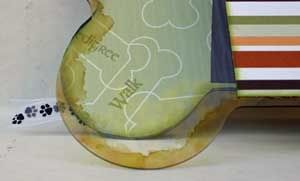
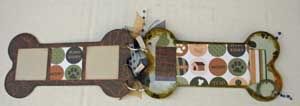
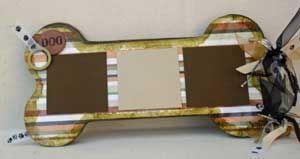
MOSD Paw Print Intracacies Example - Used as a background.

Monday, August 25, 2008

Midnight Oil Scrapbook Design GUEST DESIGNER CONTEST!!

It is finally here! I can announce that Celestial Creations & Scrapbook Supplies, Inc. has teamed up with Midnight Oil Scrapbook Design (MOSD) for their first ever GUEST DESIGNER SEARCH!!

Here is a photo of the kit:


Use this unique kit contains the following:
  • 6x12 Cover to Cover Big Boy Album by Midnight Oil Scrapbook Designs (MOSD)
  • An EXCLUSIVE set of Stick Ons by MOSD (never to be reproduced again!)
  • "Half Map" Page Map by Becky Fleck - Designed especially for THIS CONTEST!
  • Full Instructions for entering the contest through Pub Calls
CONTEST RULES:
  • The contest is open to residents of the USA only.
  • Winner will recieve a prize pack of MOSD product as well as the Mod Squad Designer Package for November 2008.
  • The Retailer where the winner purchased the Contest Pack will win a prize pack of MOSD products.
  • Contest runs from August 25th through September 30, 2008 - ALL ENTRIES need to be recieved through Pub Calls by MIDNIGHT of September 30, 2008.
  • You must use the Half Map sketch on at least ONE PAGE.
  • Use of the Stick Ons is encouraged, but not required.
  • Submission:
    • Take high-quality photos and e-mail them to pubcalls@gmail.com with the subject line of: MOSD DT CONTEST. The body of the e-mail must contain your Name, Address, Phone Number, E-Mail Address and the name of the Store that you purchased your Contest Pack from.
    • Make sure to show off as much of the album as possible
    • Specifically mention the page(s) inspired by the sketch
  • Any questions - please contact the MOSD Contest Coordinators
    • shannon@mosdinc.com
    • christy@mosdinc.com
Need more details on the contest? - visit www.pubcalls.blogspot.com

Check out my previous blog on Acrylic Albums here